China cabinet makeover
Hello lovely people!
When we moved into our house, we inherited this wooden cabinet from the previous owners of the house. We needed some storage at the time and even though it wasn’t to our taste, we kind of lived with it for a while!
I have to admit that I was too scared to pick up a brush and actually do something about it! Then, after many manyyy years, my husband threatened to get rid of it, and I finally geared up enough courage to do my first real, large scale DIY! I have no idea what I was so scared of! Yes, it is tedious, daunting and requires a lot of patience, but once you start, it just kind of happens. Of course, it’s not perfect, but I totally love how it’s turned out! I took my own sweet time, and did the makeover in stages, so it didn’t feel as daunting and I could get some feeling of accomplishment from time to time!
This project has definitely given me a lot of confidence and I have moved on to greater things now (like painting walls :D).. but you have to start somewhere, and this is where I started!
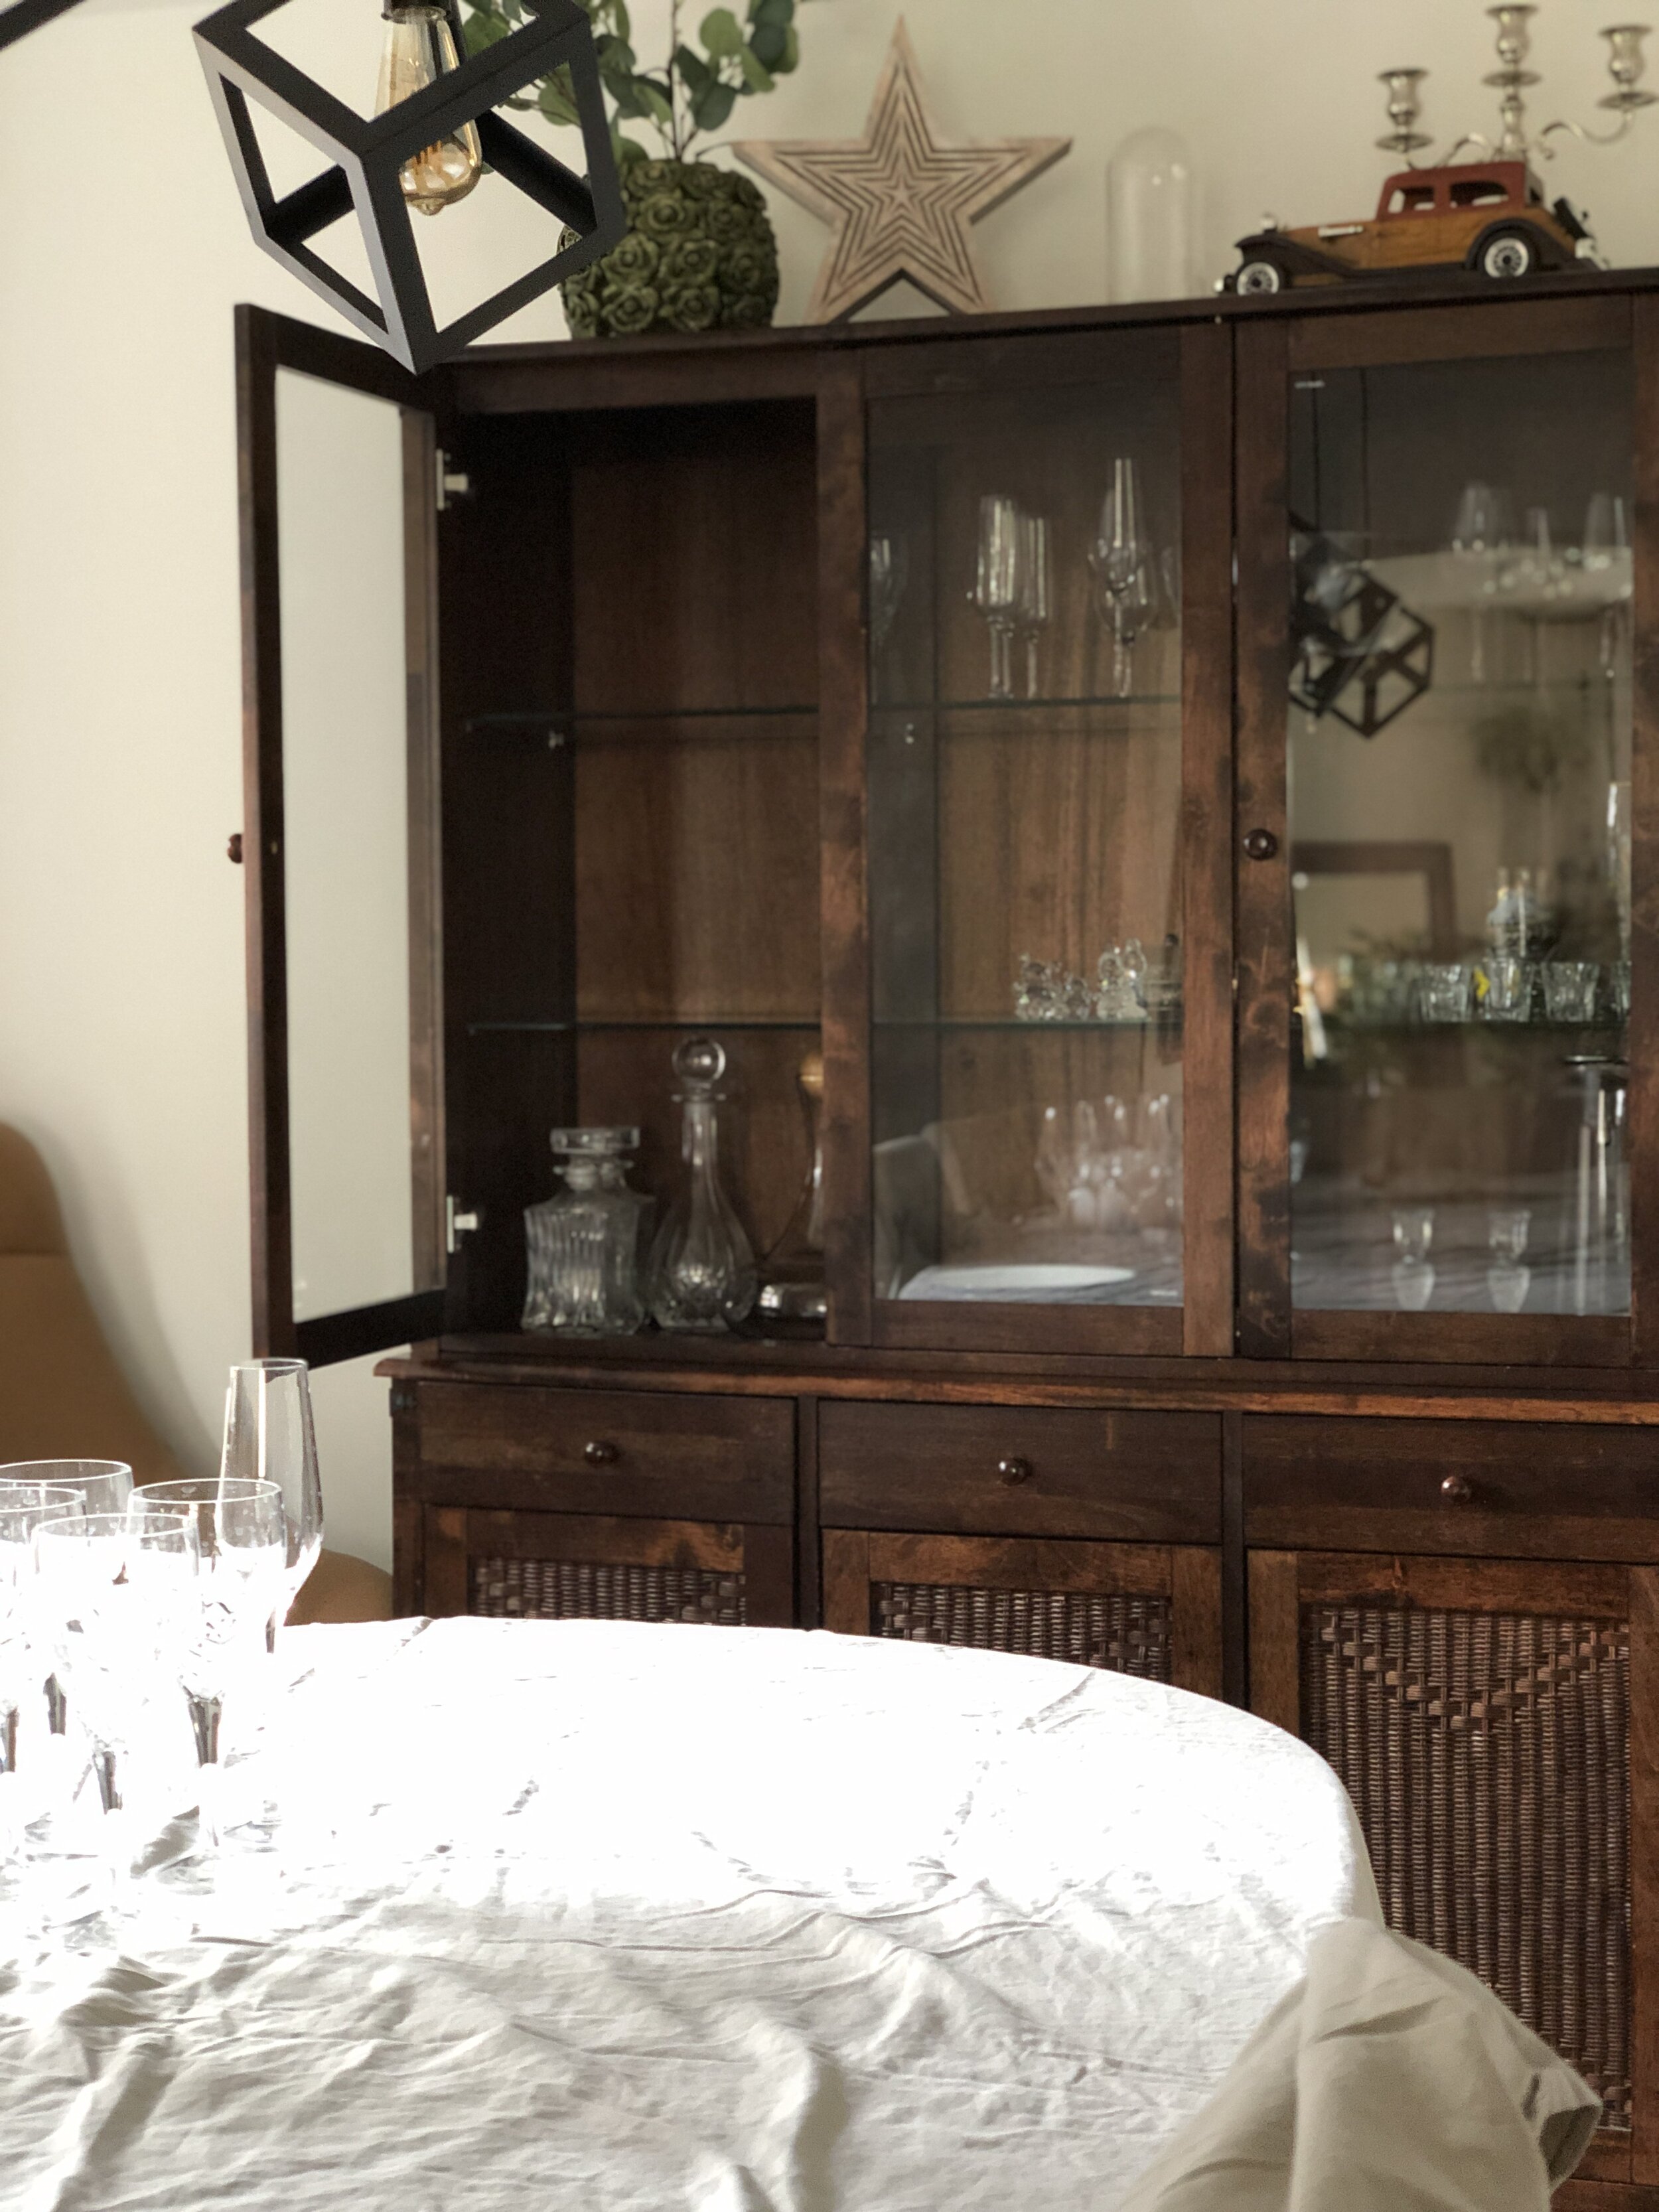
Before:

So, this is what I had to work with! It was pretty much a large wooden blob and whatever I displayed in it, just got lost into the background. So my first job was to make the insides of the cabinet a lighter colour. I initially considered using a patterned wallpaper, but then decided against it because (a) too much work (b) the surfaces were not smooth and had lots of protruding wood in places (c) I didn’t want to take on too much work and then abandon it midway!
So I spent a good couple of hours on Pinterest and created a board for my new improved china cabinet. I decided to use a white paint on the insides of the cabinet so whatever I would display/store in the cabinet would stand out. The dining room is quite dark to begin with, so I wanted something bright to lighten up the space!
I had heard a lot about Frenchic paint and decided to use a simple white chalk furniture paint from Frenchic. Chalk paint is such a great idea if you’re a beginner and don’t want to spend ages sanding and priming! I chose the shade ‘Whitey white’ from their Lazy range and also bought two types of brushes and sugar soap (to clean the cabinet before painting) from Frenchic. They have really good quality paint and brushes and getting the right tools made my life really simple!
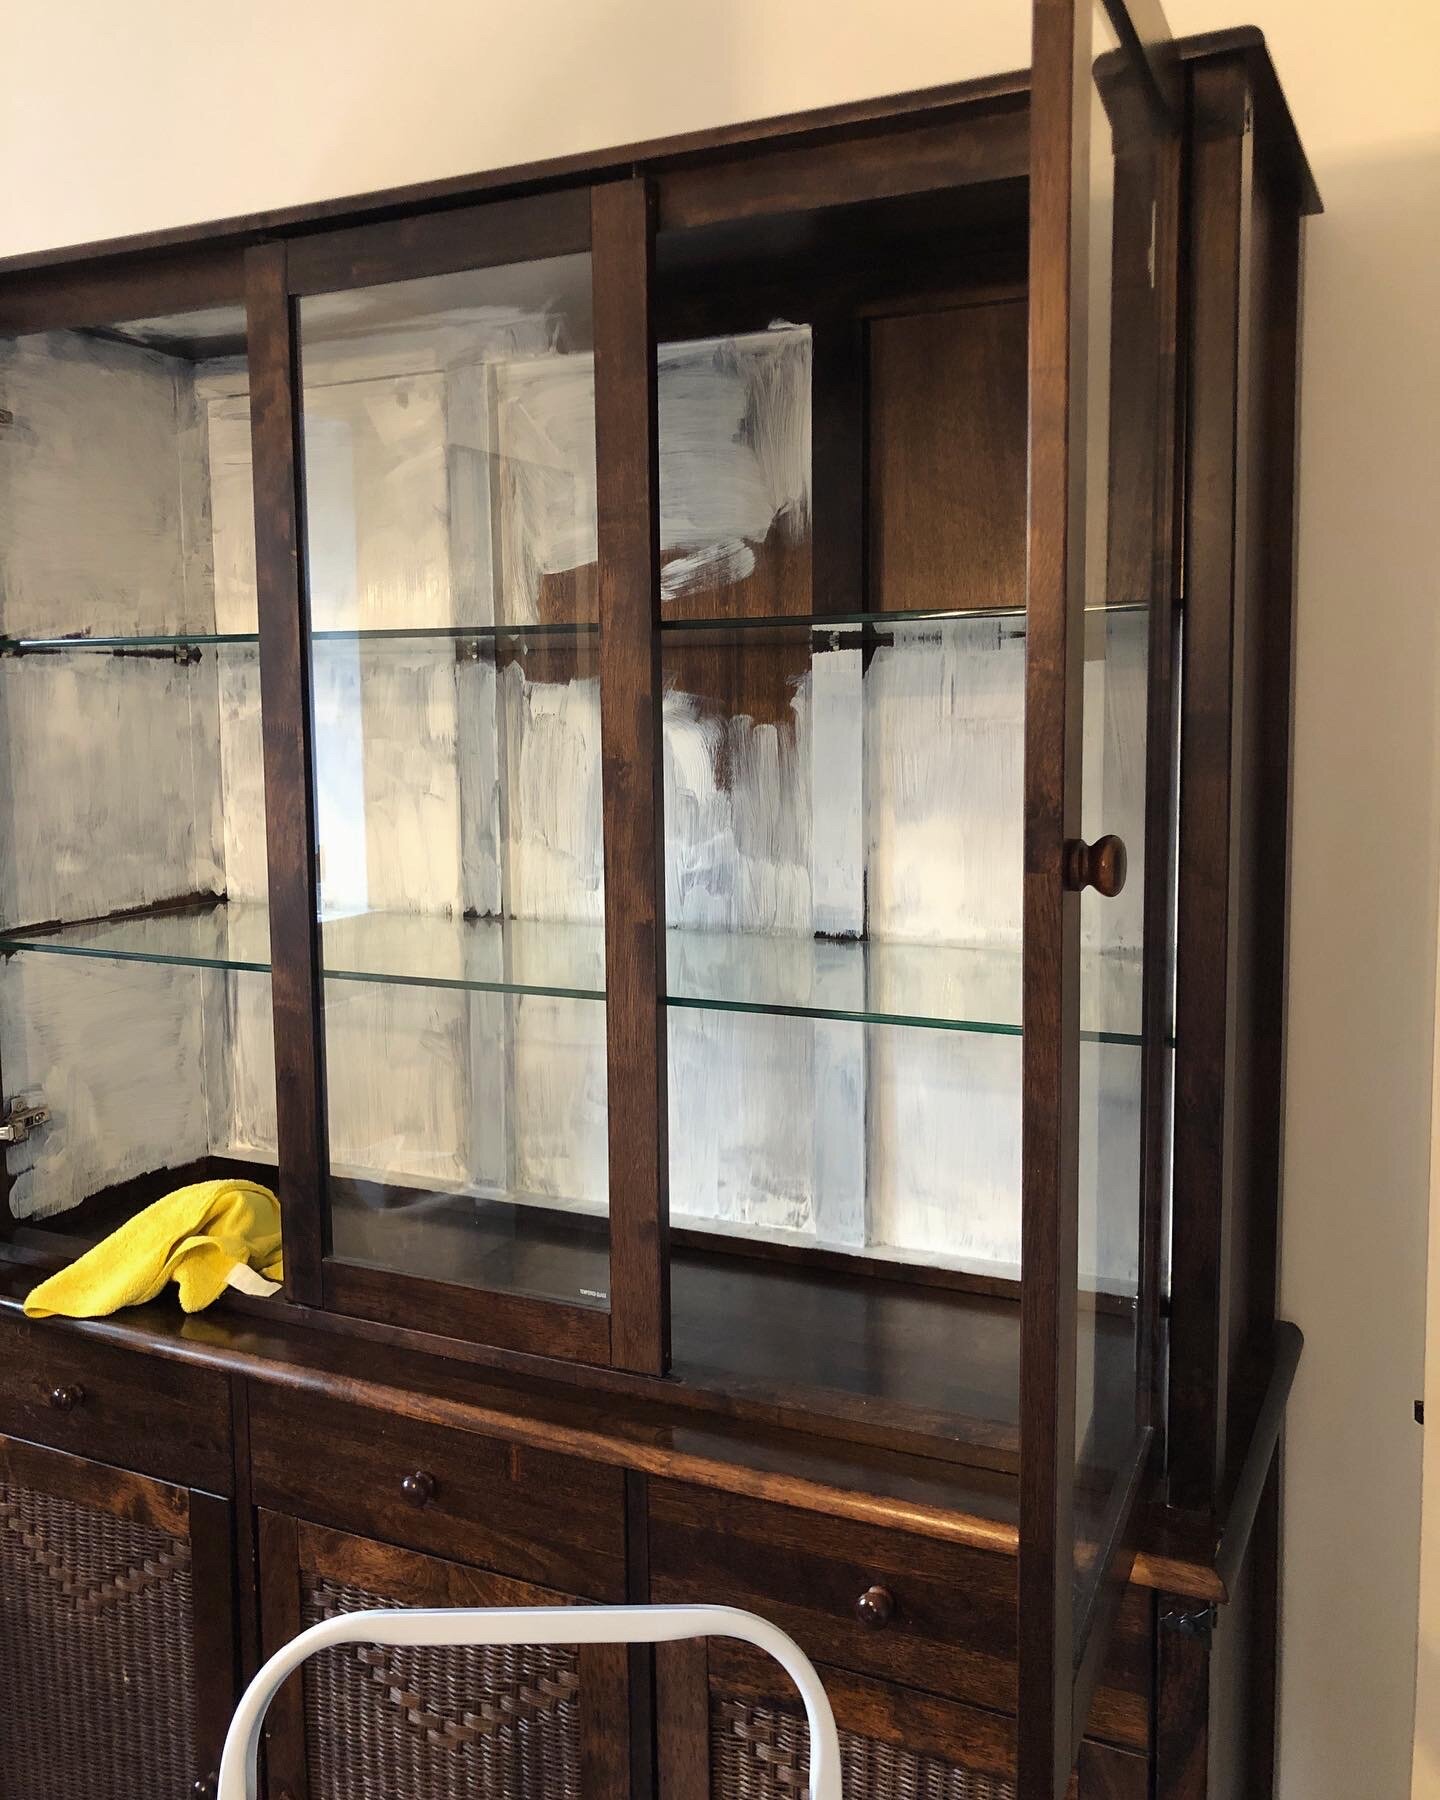


It was a bit tricky to paint the insides without taking off the shelves (because I wasn’t able to remove the shelves), and there was paint everywhere! Masking tape would have been a good starting point, which I discovered later! Oh well, once I realised that I should use masking tape, I literally went crazy with it and taped up every mm of space that I didn’t want to paint over! It kind of did the trick, and after 3 coats of white paint, I was happy with the result! It’s not the neatest job in the world, but it has made such a big difference!
Once the insides were painted, I decided to change the drawer knobs and door handles to something more interesting and slightly eclectic. I love how changing drawer knobs can totally change the look of any cabinet or chest of drawers/dressers! I went to TK Maxx, and picked up a few different types of drawer knobs. They didn’t have 2 sets of the same type, so I had to pretty much mix and match and make it work! I finally decided to use ceramic knobs with a bit of pattern - just to add a bit of interest and an eclectic touch.
AFTER:

Looks so much better right?? At least you can see what’s displayed in the cabinet and there’s a bit of contrast and interest! So, having gained a bit of confidence in my painting abilities, I decided to paint the outside of the cabinet. I wanted to first do a dark green or navy, but then it would still be quite dark, and I wanted to lighten up the room. So I decided to go with a slightly controversial pink :D Best decision ever! I chose a beautiful ‘Antique Rose’ shade from Autentico Paint and it went on beautifully! I’m totally in love with this pink and so glad I went for it!
Painting the outside of the cabinet was surprisingly easy and straightforward. I suppose I had learnt from my previous mistakes and had masked the glass and other bits before starting to paint! There were a few minor spills and scratches but I was able to do 3 coats of paint in 3 days. The paint actually dried quite quickly between coats but I was too tired and had to take breaks between coats!
FINAL AFTER:

I’m so happy with the end result! I think the ceramic knobs look much better with the pink and the whole dining room looks a bit brighter. Best part is, I have loads of pink paint to spare which I’m definitely going to use for another project!

What did you think of the makeover? Have you done any furniture upcycling? I’d love to know how your experience was! Please comment below!
xx